Monday, September 26, 2011

F is for Fall, Fresh Herbs, and Football

I know I'm a few days late, but fall is officially here!  Nevermind that it doesn't feel anything like fall, but I have hope that it's on the way.  Our first weekend of fall was filled with... you guessed it!  Football!  Now, like I've said before, I can watch football, but only if it's a team I like or care about, and most of the time I can't just sit and watch.  On Saturday, the Aggies and Arkansas played at the same time, so I obviously lost, and the Razorbacks were on the big TV.  Here's a little insight into my afternoon: First Anthony jumps up yelling with excitement and sheer joy at some "amazing play."  Then, he throws his hat on the floor and stomps around a little when there is a flag thrown and a penalty called on Arkansas.  After the replay, he sits back down calmly telling no one in particular that he understands and it was a good call by the ref.  All of this occurred in about 30 seconds... and he calls me moody. :)

While all of this was going on, I decided it would be a perfect time to put together my fresh herb plants! I LOVE cooking with fresh herbs, and I HATE buying them at the grocery store because A. They are expensive, and B. They go bad so quickly.  I bought these cute blue pots on sale at Michael's back in May for like $3 with the intention of planting my own herbs.  I have been wanting to paint chalkboard labels on them because when I grew herbs back in Dallas, I always forgot which were which. Here is what I did:
 Cute blue pots!

Cut paper the size of the area I wanted to paint.

Traced the paper onto the pots.

Taped newspaper around tracing.

Spray painted with chalkboard paint.

Took off all the newspaper.  Almost there!!

Planted plants and wrote labels. 

How cute are those?! I know, I know, the rosemary needs a little water. :) And I couldn't find cilantro that was already grown, so I had to plant seeds.  Now I just have to remember to water them!!  My craft for the day definitely helped during football madness, and eased the pain of both the Aggies AND the Razorbacks losing.  Tune in next Saturday because I'm sure A&M vs. Arkansas will make for some interesting stories!!

Love, Sara :)

Thursday, September 22, 2011

Disastrous Dinner

I like to think of myself as somewhat creative and economical in various areas of my life.  In the kitchen, I like trying to make new things and making up my own recipes.  The economical side is that I hate having things go to waste.  I decided to use some stuff we had and throw together dinner for tonight.

When looking through the pantry, I thought it would be such an awesome idea to use the Hamburger Helper and make something super yummy.  I know, I know...Hamburger Helper is not my thing AT ALL, and I promise it was here before I moved.  First, I hate hamburgers.  Second, I RARELY use something straight from a box.  My economical side came out and just couldn't throw it out.  No worries, I checked the expiration and it was totally fine! :)

On the back of the box it said they had "creative addition" ideas on their website.  I thought it would be genius to make it with chicken instead of ground beef, and then add stuff from the creative addition section to make it more of my own.  I had the hamburger mac and cheese flavor, and they suggested adding corn...weird, I know, but for some reason I thought it was a GREAT idea.  So I added corn.  Bad idea #1.  Well, I guess the chicken was Bad Idea #1, so corn was Bad Idea #2.  The corn tainted the WHOLE thing and every bite tasted like corn...yuck.  I then just tried adding stuff to mask the corn.  First came onions.  Those weren't so bad, but then came spices... Let me just say, Garlic Powder and Onion Powder were good choices.  Cumin?  Absolutely not.  

The dish was awful, however Anthony was super sweet and kept telling me how wonderful it was.  When I made a comment about the nasty corn, he said, "The corn is what made it!  Definitely wouldn't be the same without it."  You can say that again.  The only upside is that I made Funfetti bars for dessert.  At least we had something to look forward to!!

Since tonight's dinner was so bad, I thought I'd share a recipe I made from my friend Elyse's blog.  They are breakfast cups and super yummy.  Anthony and I both LOVE breakfast food, but not really for breakfast.  We made these for dinner last week and here is the recipe: 


How cute are they?!  These were so delicious and had the toast, egg, and bacon all in one little bite. Anthony suggested we do scrambled eggs in the middle next time, but I think they will take away from the simplicity and cuteness of them.  I'm sure I'll try them with scrambled eggs, and I will get back to you on how they turn out.  :)  Have a great rest of your week, and steer clear of Hamburger Helper!!!

Love, Sara :)

Monday, September 19, 2011

Fun Shoes, Funfetti, Fun Day!

It FINALLY rained!  Yay!  I have seen maybe a drop of rain since I moved here in June...yikes!  I was so excited I had an excuse to wear my new rain boots!!!

Cute, right?!  My original plan was to wear them on my way to school and during car pool and change into my sandals when I got in the school.  The building was so super cold and my toes were frozen, so I gladly wore them all day.  Nevermind that the rain stopped around 9:00. :) They were just too much fun to take off!

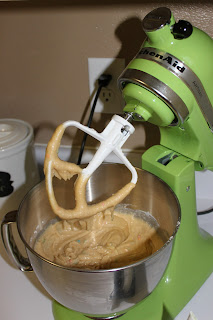
Speaking of fun... (nice segue, right?!) I found this AWESOME new recipe for Funfetti bars!! I found the original recipe via Pinterest on the blog Lovin' In The Oven, but the recipe only made a batch of 9x9 bars.  For some reason, I REALLY like making things using a 9x13 pan... 4 extra inches of dessert?  Yes please!  I easily solved my problem and adapted the recipe to fit my 9x13 pan.  

Funfetti Cake Batter Bars:
1 cup butter, melted then cooled
1 cup sugar
1 cup brown sugar
3 teaspoon vanilla
2 eggs
2 cups funfetti cake mix
1 cup all-purpose flour
6 tablespoons of sprinkles (not necessary, but makes them more colorful!)
 
1. Preheat oven to 350.  Mix butter, sugars, vanilla, and eggs on low until smooth.

2. Add Funfetti mix, All-Purpose Flour, and sprinkles.  Mix on low until dough comes together.  (If you don't have all the sprinkles the recipe calls for, you can just use what you have)


3. Spread into a greased 9x13 pan. 

4. Bake at 350 for 30-35 minutes or until golden brown.

5.  Allow bars to cool completely before cutting into bars.
Ta-da!  How yummy and fun does that look for a rainy day!  They taste a lot like the Texas Gold Bars my mom makes around Christmas, but the Funfetti make these more fun (obviously!).  Enjoy the bars and keep praying for rain!!

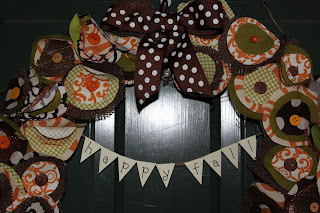
P.S. I know you were absolutely beside yourself worrying about how the little paper signs on my new Fall Wreath held up in the rain.  I am extremely happy to report that all of the letters are still intact and none of the ink has run...yet.  Yay!!!

Love, Sara :)

Sunday, September 18, 2011

World Travelers

In my room in college I had a wall covered with pictures from various places I had been.  I loved being able to look at gorgeous views and historical landmarks and reminisce about my trip there.  The wall quickly became known as my "travel wall" ...creative, I know.  When I was getting ready to move, I talked with Anthony and we decided it would be fun to continue the "travel wall" with pictures we would take in Italy.  The only difference is that we wanted to start collecting paintings from local painters where we traveled and incorporate them in with my photographs.  

While in Italy we bought a gorgeous painting of the Piazza Novona while walking through... you guessed it! the Piazza Novona!  There are all of these adorable little shops and cafe's lining the piazza, and we thought it would be a perfect first painting.  We bought the canvas and thought it would be an inexpensive piece of art and the easiest thing to get it framed back in the states... not so much.  Long story short, but after trying place after place and frame after frame, someone informed us the canvas wasn't an exact size that we use here in the states, so we had to get a custom frame.  Definitely not the most inexpensive route.  All in all, we ended up loving the picture and it looks great on our travel wall!

There are 15 photos in addition to the painting, so I was not sure how to place the pictures and get all of the nails right.  While browsing Pinterest (Pinterest never lets me down!) I found the perfect solution.  You cut paper to be the exact size of the frame you are wanting to hang, put a dot where the nail will need to go, tape the paper up, and put the nail through the paper on the dot you drew.  It's great because you can reposition the "pictures" as much as you want until you decide EXACTLY how you want them.  Here is what mine looked like: 

I was SOOO glad I did it this way because I changed how I wanted the pictures at least five times.  I left the papers up for a few days so I would be sure they were EXACTLY correct.  Here's where Anthony comes in!
 
This seriously saved us a lot of stress because we would have never agreed on exactly where to put the nails. :)  
 And here's the finished product!!  I am still waiting on dad to search through his computer for certain pictures, so ignore the empty frames.  :)  Other than that, we LOVE it!  It seriously adds so much to our little dining area.  And it's a great way for me to be able to share with Anthony where I've been and for us to remember our trip to Italy.  Now we just need to plan another trip!

P.S. Don't miss my Kindergarten Comments! I just updated them and, can I tell you, Kindergarteners are just the cutest things!!!

Love, Sara :)

Friday, September 16, 2011

Football Season

I always have known how much Anthony loves watching football in the fall, but since we never lived by each other, I never realized how much he REALLY loves watching football.  The past two weekends we have had football on most every second we have been home.  Now, I like watching certain games or teams, but I can't watch a game where I don't know anything about either team, or any of the players.  So while Anthony is sitting and watching games, I decided it was a perfect opportunity to try some "football" recipes. 

Now, when I think "football food," my mind immediately goes to pizza.  I already have a pizza recipe I like, so I decided to try pizza in a little less traditional way.  What I found was this great recipe for pizza cups!

Pepperoni Bacon Pizza Cups:

3/4 cup flour
3/4 teaspoon baking powder
3/4 cup whole milk
1 egg
1 cup shredded mozzarella cheese
1 cup pepperoni cut into quarters
1/2 cup pizza sauce

Preheat oven to 375o.  Grease a 24-cup mini muffin pan.  In a large bowl, whisk together the flour and baking powder, whisk in the milk and egg.  Stir in the mozzarella and pepperoni, let mixture stand for 10 minutes.

Stir the batter and divide among the mini-muffin cups.  Bake until puffed and golden, about 20 to 25 minutes.

Microwave the pizza sauce until warm.  Serve the puffs with the pizza sauce for dipping.

I completely forgot to take pictures as I was going, but here is my completed meal! 

Yummy and delicious!  Too bad it didn't help the Cowboys win that night... 

Love, Sara :)

Monday, September 12, 2011

Happy Pre-Fall!

As a Kindergarten teacher, part of my day consists of teaching "calendar time."  We cover anything and everything you could ever want to know about the date, month, season, weather, etc.  Although September never feels like fall in Texas, according to calendar time, it technically "falls" into the fall category. :) In honor of September and fall being just around the corner, I decided our door needed a little makeover.  I searched Pinterest for some inspiration.
My Inspiration! Courtesy of Babe of My Heart
How cute is that?! When Saturday came, I was at Hobby Lobby bright and early to get started.  Now, I'm not really a black and orange Halloween-y colored girl (sorry Pioneers) and I really wanted something I could keep up through Thanksgiving, so I changed the color scheme.

 
After I gathered my supplies, I began tracing circles.  I used different sizes of measuring cups to get the different sized circles.

 
I traced and traced and traced, then cut and cut and cut, and finally was ready to assemble my layers.  I picked three different circles, made all sorts of combinations, and secured them with a straight pin.  This was easily my favorite part.  I know it sounds nerdy, but I loved playing with the different patterns and colors! I kept calculating how many different combinations I could make...is that embarrassing to admit?
 
After all my circles were pinned, I put a TON of hot glue on the back of the straight pin, and stuck it in my wreath.  The actual wreath made an absolute MESS.  Check out all the little pieces of wreath that Anthony was so sweet to vacuum up for me. :)

 
I added a bow and a cute little "happy fall" sign, and it was ready for the door!  


It's crazy how much more homey it feels with just a wreath.  I definitely enjoy coming home and unlocking the door much more now! Anthony obviously really likes it too. :) Happy pre-fall everyone!!!


Love, Sara :)

Thursday, September 8, 2011

Dad Comes For Dinner

We had our first dinner guest last night!  My dad flew through Houston on his jump-seat rides, and stopped in just in time for dinner.  He got in at 4:30, which means I didn't get to the airport until nearly 5. 


 Arriving at the airport!

 There's Dad! He obviously wasn't aware I was documenting out evening...

He got to drive.  I had had enough of Houston traffic.

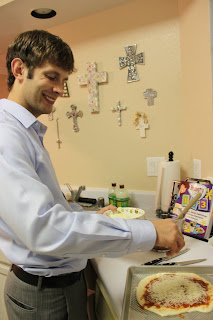
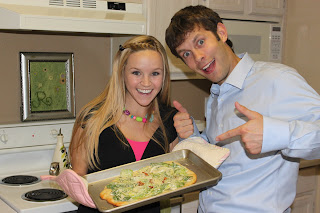
We got to our apartment about the same time as Anthony.  Dad had to be back at the airport for a 9:00 flight, so we started dinner right away.  What did we make you ask?  PIZZA!!!  I made the dough the night before and set it out to rise when I went to pick up Dad.  It was perfect by the time we got home.  I got the dough recipe from watching Kelsey's Essentials on the Cooking Channel.  My pizza, Caesar Salad Pizza, was from there too, but I figured Dad and Anthony didn't want salad on their pizza, so I let them make their own.  Being that Dad was only there for a short time, I was determined to document the whole evening.  Bear with me...I took a lot of pictures for a small about of time. :)

  The beginning of working the dough.  This is before it got a
little crazy. :)


Check out Dad's toss!


And Anthony's toss.  You can't even see his dough!
 

They got to share a pan because they had the same toppings.

Spreading on the homemade pizza sauce.


Ready for the oven!


My Caesar Salad Pizza is done!


And a close up. :) Sounds gross, but it was DELICIOUS!


Their pizzas are finished too!

We had extra dough, so I made garlic knots and cinnamon sugar knots from the same place I found the pizza dough recipe.  


Finished knots!  The top are the garlic, and the bottom are the cinnamon sugar.


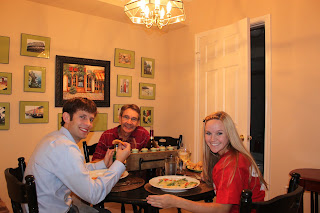
Finally getting to eat!  And I got to learn how to set the self-timer on my camera. Woohoo!!  The pizzas were AMAZING!!  I had made the knots before, but the dough as actual pizza dough was awesome too.  So fun to make with guests, or by ourselves, and something we will do again soon.  We seriously ate, and then took Dad back to the airport.  He was at our apartment not even 2 hours.  I would definitely say is was a successful trip anyway.  Besides, Dad is always welcome at our home. :)

 Bye!  Come again soon!

Love, Sara :)