Monday, October 31, 2011

Pumpkins: Part Three

In honor of Halloween and my recent pumpkin theme, I decided to share some of the recent pumpkin recipes I have made.  Not to mention, one of my favorite fellow Sky Ranchers really wants to make some pumpkin dip.  :) So get ready for some pumpkin greatness! On the menu: Pumpkin Dip, Pumpkin Waffles, and Pumpkin Monkey Bread!  And for a bonus... a Pumpkin Dump Cake recipe!! (This is code for I made a Pumpkin Dump Cake, but forgot to take pictures as I went and, therefore, can't really explain how to make it :) )

First up...

Pumpkin Dip! (Courtesy of my awesome school cookbook!)
  • 4 cups powdered sugar
  • 2 8oz. packages of cream cheese, softened
  • 1 can pumpkin pie filling
  • 2 tsp. ground cinnamon
  • 1 tsp. ginger
In a large bowl, combine sugar and cream cheese.  Cream until well blended.  Beat in remaining ingredients. Store in the fridge until you are ready to serve.  I've tried this with bagels, toast, and vanilla wafers, but gingersnaps win by far for the best dipping 
partner. :)

Up next...

Pumpkin Waffles! (adapted from several sources)


  • 1 1/2 cups all-purpose flour
  • 3 teaspoons baking powder
  • 1/2 teaspoon baking soda
  • 1 teaspoon cinnamon
  • 1 teaspoon nutmeg
  • 1 teaspoon ground ginger
  • 1 pinch salt
  • 2 eggs
  • 1/4 cup firmly packed brown sugar
  • 1 cup canned pumpkin puree
  • 1 2/3 cups milk
  • 4 tablespoons butter

    • 1/4 cup light brown sugar
    • 1/4 cup brown sugar
    • 1 1/4 cup all-purpose flour
    • 1 1/2 tsp. baking powder
    • 1/2 tsp. salt
    • 1 3/4 tsp. cinnamon
    • 2 tsp. ginger
    • 1/2 tsp. nutmeg
    • 2 large eggs
    • 1 cup  milk
    • 1 cup canned solid-pack pumpkin
    • 4 Tbsp. unsalted butter, melted
    • Nonstick Spray
    First, combine the sugars, flour, baking powder, and spices, and whisk slightly.  Then, add the eggs, milk, pumpkin, and melted butter and whisk until smooth.


  • 1 1/2 cups all-purpose flour
  • 3 teaspoons baking powder
  • 1/2 teaspoon baking soda
  • 1 teaspoon cinnamon
  • 1 teaspoon nutmeg
  • 1 teaspoon ground ginger
  • 1 pinch salt
  • 2 eggs
  • 1/4 cup firmly packed brown sugar
  • 1 cup canned pumpkin puree
  • 1 2/3 cups milk
  • 4 tablespoons butter


  • Spray a waffle iron with nonstick spray and pour batter to cover the bottom half of the iron. (About a cup)  My waffle iron has a timer, but if yours does not, cook for about 4-6 minutes or until waffles look golden brown and slightly crispy.

    Serve with butter and syrup and enjoy!!

    P.S. These can be frozen and then stuck in a toaster to enjoy later.  I made a huge batch when I was going to be gone for a while so Anthony wouldn't starve. :)

    Now, this next recipe I found on pinterest, and is a little labor intensive, but DEFINITELY worth it!

    Pumpkin Monkey Bread (From Sugar Crafter)

    Dough:
    • 3 1/4 cups flour, plus extra for kneading
    • 1/2 tsp salt
    • 1/2 tsp cinnamon
    • 1/4 tsp nutmeg
    • 2 Tbsp unsalted butter, melted
    • 1/2 cup warm milk
    • 1/4 cup warm water
    • 2/3 cup canned pumpkin
    • 1/4 cup sugar
    • 2 1/4 tsp active dry yeast
    Coating:
    • 1 cup sugar
    • 2 tsp cinnamon
    • 3/4 stick butter, melted
    Glaze:
    • 2/3 cup powdered sugar
    • 1-2 Tbsp pure maple syrup
    In a large bowl, mix flour, salt, and spices.

    In another bowl, whisk together milk, water, pumpkin, melted butter, sugar, and yeast.

    Make a well in the middle of the dry ingredients and add in the wet ingredients until dough starts to pull together.  Turn out onto a floured surface and knead until smooth.  Spray the inside of a bowl with nonstick spray and place dough inside.  Cover with a cloth and allow dough to rise for an hour.

    In the meantime, mix together the cinnamon and sugar, and melt the butter for the coating. Spray a bundt pan with cooking spray. Once the dough has risen, shape the ball into a large rectangle. Using a sharp knife, cut the dough into roughly equal-sized pieces and roll each piece into a ball.
     

    Dip each ball of dough into the melted butter and then the cinnamon-sugar mixture, layering them in the bundt pan as you go.

     Once you’ve used all the dough, pour the extra butter/sugar mixture over the dough.  Cover the bundt pan and let the dough rise again for another hour.
     
    Preheat the oven to 350 degrees. Bake the bread until golden brown, 30-35 minutes. Let cool for 5-10 minutes before turning out on to a platter. To make the glaze, stir together the powdered sugar and maple syrup. Pour over the bread while it’s still warm.

    Delicious!!! That one definitely didn't last long! :)

    And for my final pumpkin recipe... (and probably my fave!) 

    ...Drumroll...

    Again, I forgot to take pictures of the pumpkin dump cake, but you HAVE to go to go to the Cookies and Cups Website and try it.  It's even better with ice cream. Actually, isn't everything better with ice cream? Anyway, it's perfect for Halloween, October, and Fall in general.  Hope you had a wonderful Halloween!! :)

    Love, Sara :)

    Sunday, October 30, 2011

    Pumpkins: Part Two

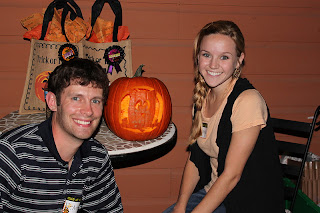
    A few weeks ago Anthony and I went to a pumpkin carving party.  We got our pumpkin, I baked my favorite Funfetti bars, and headed over to the party.  Here's a sneak peak into our weekend. :)

     Funfetti Bars are ready for the party!  I was super sad I couldn't find Halloween sprinkle to put in them though... :(

    How cute is this?!! I totally wish I could claim this as mine...

     Can't claim this one either. :(

    Steph with her pumpkin oatmeal cookies!  So good!!

     Anthony starting to carve our pumpkin.

     Digging out the grossness...

    Who wants a stencil? Not us! I'll draw one, thank you! :)

    I decided to shade in what he needed to cut...just so he didn't get confused.

    Carving our owl!!

     And our finished product!!!

    Glowing pumpkins are so fun!

    Steph and me with our completed products!

    Since the carving party I have seen some pretty cute owl pumpkins. (Ahem...My fellow Davis Chi-O!!)  I will definitely be trying a different owl approach next year.  Not to mention, the cinnamon I put inside our pumpkin to keep it from rotting as quickly (trick from another of my favorite Davis teachers!) did work in extending the life of our owl-pumpkin, but our poor pumpkin still didn't make it until Halloween.  Good thing I made my flower arrangement from a fake one!!

    Love, Sara :)

    Friday, October 28, 2011

    Pumpkins: Part One

    One of my favorite things about fall is pumpkins.  I love the shape, the various sizes, the flavor, the sound of the word, pretty much everything... except for maybe the color.  I even call my Kinderfriends "pumpkin" and "pumpkin pie" on a daily basis - partly because it just makes them giggle, and partly because I just like pumpkins. I know October is almost over, but I thought I would share my fun fall/pumpkins decorations!

    My first creation was a centerpiece for our table.  Now, pumpkins aren't the main attraction here, but they play an important role in the overall look. :)

    So I gathered all my supplies: rectangular vase, baby's breath,
    floral foam, brown burlap, raffia, and a knife

    I measured and cut the floral foam to fit inside my vase.

    Then, I measured my vase with the brown burlap, secured it with tape...

    And finished wrapping the burlap around the vase.  Don't want to be able to 
    see the floral foam! :) 

     Next, I wrapped the raffia around the burlap and tied a cute little knot.

     After filling with the baby's breath, it was ready for the table!  Here's where the pumpkin came in. :)


    My second project involved yet another pumpkin.  Now, the best thing about this pumpkin is the AWESOME deal I got on it.  So I went to Hobby Lobby for a fake pumpkin.  They were originally $22 (a little ridiculous if you ask me...) but were on sale for 33% off.  I found one that was the correct size, but the stem was broken.  I knew I was going to cut off the top, so, being the genius that I am, I asked for an additional discount.  The manager upped it to 66% off.  Then, I gave them my 40% off coupon... and got my pumpkin for $4!!! Yay!!

    Here's my pumpkin...

    And a close up of my discount!!

    I cut off the top,

    Stuffed the pumpkin with floral foam, 

    And filled the foam with baby's breath.

    And here's the finished product!!
     And even though it has no pumpkins, here's my last fall decoration. :)

    The thing I love most about the pumpkin decor is that it works for all through the fall.  And the best thing about baby's breath?  It dries exactly how you put it in the foam and stays FOREVER!!  Well, maybe not forever, but you get the idea.  :) Check back soon for Pumpkins: Part Two!!

    Love, Sara :)

    Monday, October 24, 2011

    No Blueberry Scones?! Again?!

    There is a local coffee shop back in Dallas that I just LOVE.  They have the best chai lattes and the absolute most delicious blueberry scones I have ever had.  I'm not completely sure where my love of scones came from... it may be that they remind me of my first time to have high tea in London with Grandma and "the girls", and, therefore, they make me feel fancy, but I'm not totally sure.  Anyway, I try scones any chance I get, and these blueberry scones are the best I've ever had.

    A couple of weeks ago I was in Dallas for Holly's wedding.  I was there for a total of 4 days, and planned on having my chai latte and blueberry scone at least twice. ...I mean, come on, they are THE BEST and it's not like I can go get one whenever I want.  So I drove over Thursday and... THEY WERE OUT!  I didn't fret, because I was going to be there 3 more days.  So Friday I drove over... OUT AGAIN!!!  I was beginning to get a little nervous.  Saturday I tried again, and I guess third time is the charm because they had 1 left.  Yay!!  I finally got my scone!

    The following Monday I had a day off from school, so to commemorate my experience, I decided to make homemade blueberry scones.  I found this recipe about 2 years ago when I had a snow day and, once again, couldn't get to my coffee shop for my scone. :)   Grandma Johnson's Scone Recipe (whoever that is!) is definitely one of my favorites!

    Blueberry Scones

    • 1 cup sour cream
    • 1 teaspoon baking soda
    • 4 cups all-purpose flour
    • 1 cup white sugar
    • 2 teaspoons baking powder
    • 1/4 teaspoon cream of tartar
    • 1 teaspoon salt
    • 1 cup butter
    • 1 egg
    • 1 cup chopped dried blueberries  
    In a small bowl, blend the sour cream and baking soda, and set aside. Preheat the oven to 350 degrees and  lightly grease a large baking sheet.  I have also used parchment paper, or if you have a handy dandy scone maker like I got for a wedding gift, that will work too. :)

    In a large bowl, mix the flour, sugar, baking powder, cream of tartar, and salt. Cut in the butter.
     

    Stir in the sour cream mixture and egg until just moistened.  Then stir in the chopped dried blueberries.

    Press the dough together with your hands until small ball forms.

    Turn dough out onto a floured flat surface, or a baking mat.  Knead briefly, then roll or pat into a 3/4 inch thick circle.

    Cut into triangles and place on baking sheet, or in handy dandy scone pan.  Lightly dust with sugar

    Bake for 12 minutes until golden brown.

    And Tah-dah!  Yummy homemade scones!

    Now, these obviously aren't as good as the ones from my coffee shop, but they definitely are tasty.  By the way... when I was in Dallas this past weekend I went to the coffee shop Saturday morning, ordered my chai and scone, and went home.  I then realized they got my drink order wrong so drove back to get it fixed.  For my troubles they gave me another FREE blueberry scone... SCORE!! :)

    Love, Sara :)

    Monday, October 17, 2011

    Wedding Watching Party

    We finally got our wedding video back!!!! Yay!! Instead of just watching, I decided we needed to make it super fun and special.  I busted out our china, crystal, and silver for the first time.  It was a huge task, being that all of it was stored under our bed.  It wasn't just under our bed though, it was WAAAY under our bed.  I had to move the nightstand, squeeze myself under the bed, and then wriggle myself backward....it probably took about 30 minutes just to get it all out.  Definitely worth it though.  

    I also decided to make my spinach stuffed chicken.  I made it for Anthony once we he came to visit me in College Station, and he always told me it was his favorite.  ...Little does he know how healthy and low in calories it is!

    Spinach Stuffed Chicken: (Makes 2 servings with a side of creamed spinach)
    • 2 Boneless skinless chicken breasts
    • 1 package frozen creamed spinach (I use Green Giant)
    • Salt and Pepper
    • Toothpicks

    Heat oven to 350. Pound chicken breasts until about 1/2 inch thick.  Salt and pepper both sides.

    Cut frozen creamed spinach into 1/4 squares.  Wrap frozen spinach in chicken and secure with toothpicks.

    Mist a nonstick pan with olive oil and place chicken seam side down in the pan for 2-3 minutes, or until chicken turns white.  This helps seal the seam so the spinach doesn't completely run out. :)

    Flip chicken and sear other side for 2-3 minutes.

    Transfer chicken to a baking dish and place in oven for 20 minutes or until chicken is no longer pink.  (You can see the leftover spinach in the background that I heated up for a side!)

    Doesn't that look yummy?!

    Here is our set up for watching the video!  And, yes, we at off our china sitting at the coffee table on the floor... :)

    Beautiful on the fancy china!!

    And our pretty crystal!  No worries, I still added Splenda. :)

    Our dinner was DELICIOUS, and the video was soooo fun to watch.  It had the rehearsal dinner speeches too, and I'll admit, my brother and my dad's speeches made me tear up all over again.  Our china is now all back under our bed safe and sound until the next big event.  I can't wait til we have a place to set them out!

    Love, Sara :)